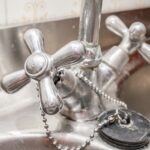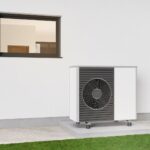
Investing in a tankless water heater is a smart choice for energy efficiency and space-saving convenience, but are you doing enough to protect your investment? Proper maintenance can dramatically extend the lifespan of your tankless system, ensuring it runs efficiently and reliably for years to come. In this article, we’ll delve into essential DIY maintenance tips that can save you from costly repairs and keep your system performing at its best.
- Learn how routine maintenance can make a significant difference in the longevity and performance of your tankless water heater.
- Discover the simple steps to inspect and clean the air intake filter, a small task that prevents major system issues.
- Follow a step-by-step guide to safely flush your tankless water heater and remove potentially damaging mineral buildup.
By following these easy-to-implement procedures, you’ll not only extend the lifespan of your water heater but also ensure it operates at peak efficiency. Dive into the article to equip yourself with the knowledge needed to maintain your system confidently and effectively.
Routine Tankless Water Heater Maintenance: DIY Tips for Long-Term Performance
Maintaining your tankless water heater is essential to ensure its long-term performance and efficiency. Regular maintenance tasks not only enhance the device’s lifespan but also improve energy efficiency, saving you money on utility bills.
One of the key tasks in tankless water heater maintenance is inspecting the system’s components. Start by checking for any visible signs of wear or damage, such as leaks, corrosion, or loose connections. These issues, if left unattended, can lead to more significant problems over time.
Routine cleaning is another crucial aspect. Ensuring that your water heater is free from dust and debris helps in maintaining efficient operation. Pay special attention to any external vents or grilles, as these are common areas where buildup can occur.
Incorporating these simple DIY tips into your maintenance routine can significantly enhance the performance of your tankless water heater. Regular checks and cleanings keep your system running smoothly, reduce the chance of sudden failures, and extend its operational life.
Inspecting and Cleaning the Air Intake Filter
The air intake filter in a tankless water heater plays a vital role in ensuring proper airflow and maintaining efficiency. Over time, the air filter can become clogged with dust and debris, hindering the system’s performance and potentially causing overheating.
To inspect the air intake filter, first, ensure the power supply to the water heater is turned off for safety reasons. Locate the air intake filter, typically found near the combustion area of the heater. Carefully remove the filter and examine it for any visible dirt or blockages.
Cleaning the air intake filter is usually a straightforward process. Gently wash the filter with warm soapy water and allow it to dry completely before reinstallation. This simple preventive measure ensures that your tankless water heater operates efficiently and prolongs its lifespan.
Perform this inspection and cleaning procedure regularly as part of your tankless water heater maintenance. This small investment of time keeps your water heater in top condition, ensuring reliable performance and energy efficiency.
Flushing Your Tankless Water Heater: A Crucial DIY Procedure
Maintaining the efficiency of your tankless water heater is crucial for optimal performance. One essential DIY procedure is regular flushing of the system. Over time, mineral deposits, particularly calcium and lime, can accumulate inside the heat exchanger.
This buildup can reduce efficiency and lead to overheating and damage. By flushing your heater regularly, you can prevent these issues, ensuring a long service life.
Before starting, gather necessary tools such as a submersible pump, hoses, and a bucket. Make sure your water heater’s power source is off, and the gas supply valve is closed, if applicable.
Here’s how to safely perform this crucial maintenance task:
First, attach hoses to the cold water service port and the hot water service port. Connect one end of a hose to your submersible pump, and place the pump in a bucket filled with a descaling solution or vinegar.
Open the service ports on the heater. This allows the solution to flow through the system, breaking down deposits. Turn on the pump and let it circulate the solution for about 45 minutes to one hour. This ensures thorough cleaning of the heat exchanger.
After the time has elapsed, turn off the pump. Close the cold service port and remove the hose from the pump. Allow the remaining solution to drain from the system into the bucket by gravity.
Open the cold water isolation valve to flush the system with clean water for an additional few minutes. This step is crucial to remove any leftover descaling solution, preserving the integrity of your system.
Once complete, close all ports, securely tighten any connections, and restore your water heater’s power and gas supply.
By following these step-by-step instructions, you help ensure that your tankless water heater remains efficient and reliable. Regular flushing not only improves performance but also helps avoid costly repairs, providing long-term savings.
Frequently Asked Questions on Tankless Water Heater Maintenance
How often should I flush my tankless water heater?
It is recommended to flush your tankless water heater at least once a year to prevent mineral buildup.
What tools do I need to flush the heater?
You’ll need a pump, hoses, a bucket, and descaling solution. Follow the manufacturer’s manual for specific requirements.
How can I tell if my heater needs maintenance?
Indications include reduced water flow, strange noises, and inconsistent water temperatures.
Is it necessary to clean the air intake filter regularly?
Yes, cleaning the air intake filter every 3-6 months ensures proper airflow and prevents overheating.
Can I perform all maintenance tasks myself?
Basic cleaning and inspection tasks can be done DIY, but complex repairs should be left to professionals.