Fed up with stubborn mineral deposits and lackluster soap scum in your bathrooms and kitchens? It’s time to tackle the persistent issue of hard water with a solution you can handle yourself: installing a water softener. Not only does this enhance the longevity of your plumbing and appliances, but it also improves your daily water experience—soft, lather-rich showers are within reach!
- Discover the true impact of hard water in your home and why eliminating it with a DIY water softener is a worthy project.
- Be prepared with the right tools and materials to seamlessly carry out the installation process.
- Learn how to tailor your home environment for the setup of your new system, ensuring optimal results.
- Follow a detailed, step-by-step guide through the entire installation process from start to finish.
- Master the art of testing and maintaining your system to guarantee its effectiveness for years to come.
Ready to bid farewell to hard water troubles? With these comprehensive insights, you’ll transform your water quality and household comfort. Embark on this rewarding DIY adventure and enjoy the numerous benefits of having soft water at your fingertips.
Understanding Hard Water: Why DIY Water Softener Installation Is Essential
Hard water is a common issue in many homes, characterized by a high mineral content, primarily calcium and magnesium. Over time, these minerals can accumulate, leading to various household problems. The effects of hard water are not merely superficial.
From clogged pipes and reduced efficiency of water heaters to unsightly limescale buildup on fixtures, the impact is far-reaching. Additionally, hard water can cause your soaps and detergents to be less effective, resulting in dingy laundry and dry, irritated skin.
For these reasons, installing a water softener can be a game-changer. A DIY water softener installation can be an essential step towards improving your home’s water quality. Not only does softened water extend the life of appliances by preventing scale buildup, but it also enhances soap efficiency, leaving your clothes brighter and your skin feeling smoother.
Tackling this project yourself not only saves you the cost of professional installation but also empowers you to understand your home’s plumbing infrastructure better. With proper guidance, a DIY water softener installation becomes a manageable and rewarding project, ensuring your home benefits from soft water for years to come.
Tools and Materials Needed for DIY Water Softener Installation: Step-by-Step Process to Eliminate Hard Water Problems
Before commencing your water softener installation, it’s crucial to gather the necessary tools and materials. Being well-prepared not only ensures a smooth process but also instills confidence as you move through each step.
The basic tools you’ll need include a wrench set, pipe cutter, and Teflon tape for sealing connections. Additionally, a utility knife and a measuring tape are essential for accuracy during the installation.
As for materials, ensure you have the correct type of piping, connectors, and fittings suitable for your home’s plumbing system. You’ll also need the water softener unit itself, which typically includes the resin tank and brine tank.
While some homeowners choose to include a bypass valve for easy maintenance and repairs, this is optional but recommended. It’s also advisable to have a grounding clamp or jumper cables handy, as local building codes might require them to maintain electrical continuity if you’re cutting into metal pipes.
By preparing these tools and materials in advance, you’ll avoid unnecessary interruptions, allowing for a seamless water softener installation process that alleviates your home’s hard water issues effectively.
Preparing Your Home for DIY Water Softener Installation
Before diving into the installation process of a water softener, several important preparatory steps must be undertaken to ensure a smooth and efficient setup. Proper preparation not only streamlines the installation but also guarantees that your system functions optimally for years to come.
Start by selecting the right location. A water softener needs to be installed close to your main water supply line, ideally next to the point where water enters your home. This maximizes efficiency and ensures your entire home’s water is softened. The location should also provide easy access for maintenance and salt refills. Additionally, ensure there’s a power outlet nearby, as most water softeners require electrical input to function.
Once the location is selected, perform preliminary system checks. Check the water pressure in your home to ensure it’s within the water softener’s operational range. Most systems are designed to work with pressures between 40-100 psi. Checking water hardness levels is also crucial, as it helps in calibrating your system appropriately.
Finally, ensure the installation area is neat and clear, with any obstacles removed. By adequately preparing your home, you lay the foundation for a hassle-free and successful DIY water softener installation.
DIY Water Softener Installation: Step-by-Step Installation Process Explained
Embarking on a DIY water softener installation can seem daunting, but with a structured approach, you can execute an effective installation that tackles hard water issues head-on. Below is a comprehensive walkthrough of the installation steps, designed to simplify the process for you.
Start by shutting off the main water supply to prevent any leaks or water wastage during the installation process. Next, drain the pipes by opening faucets, ensuring all water is expelled from the system.
Proceed to cut the main water supply line using a pipe cutter where the water softener will be installed. It’s essential to measure and mark your cuts carefully to avoid incorrect cuts.
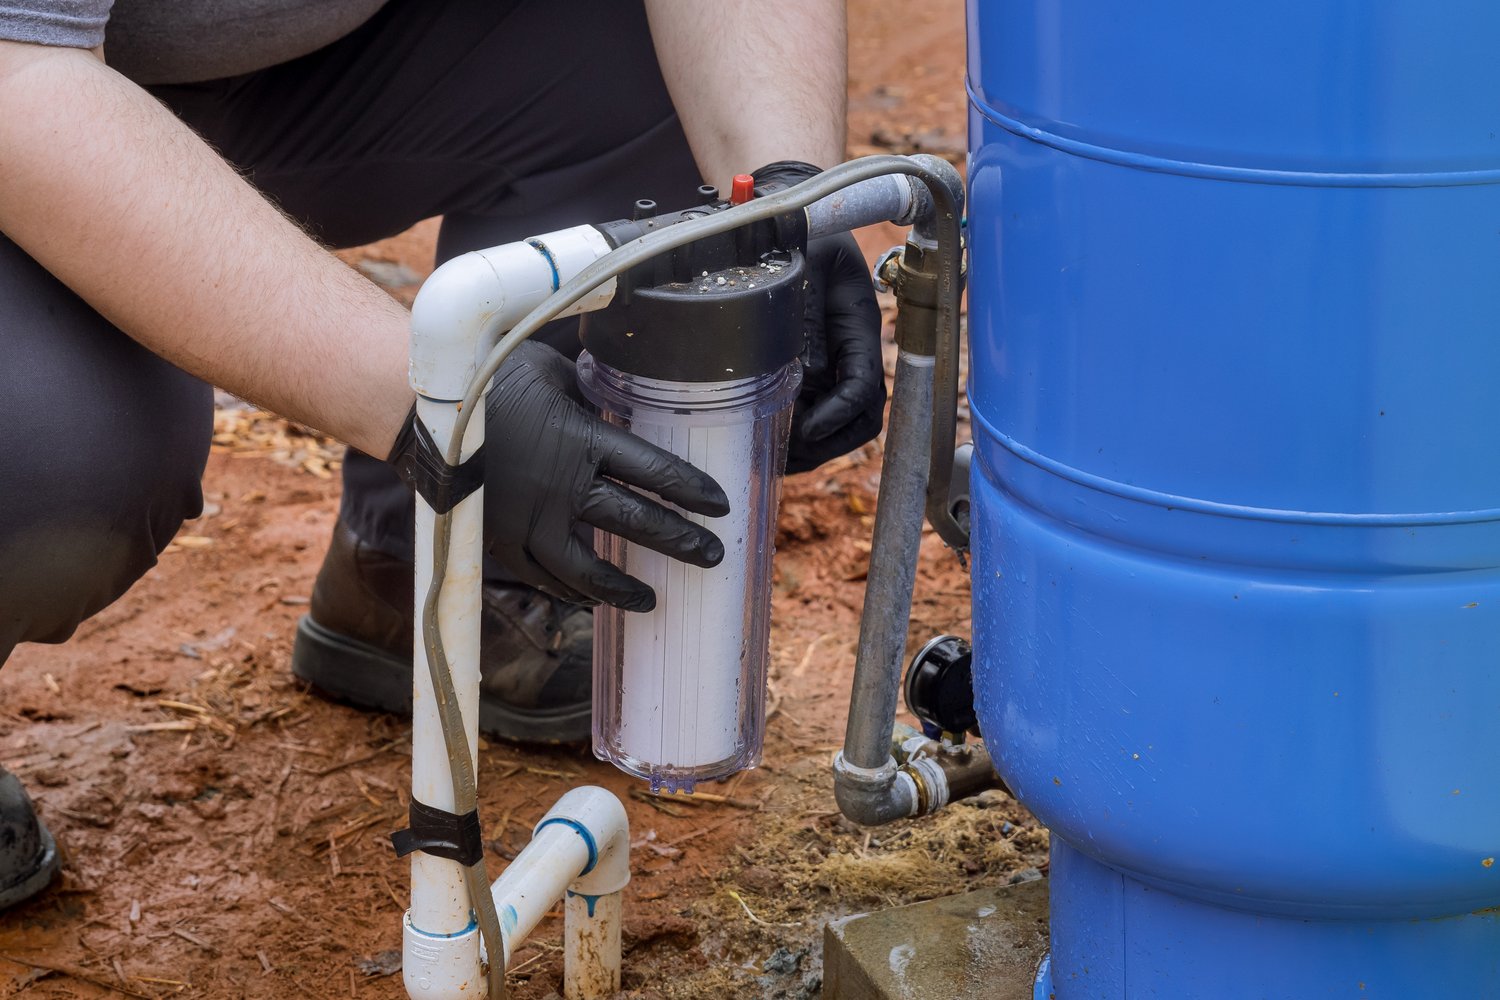
Install the bypass valve onto the water softener. This valve allows you to bypass the water softener for maintenance without interrupting the water supply to your home.
Attach the inlet and outlet ports on the water softener to your home’s plumbing. Ensure the connections are tight and secure to prevent leaks. Use plumbing tape to seal threaded connections effectively.
Once the connections are secure, connect the brine tank overflow fitting. This is crucial to prevent overflows during the water softening process. The drain hose and overflow should ideally lead to a floor drain or utility sink.
With all plumbing in place, activate the water supply slowly to check for leaks. It’s essential to track any initial water passage for potential areas of concern.
Introduce a cleaning and resin-capturing cycle to your water softener to eliminate any installation debris before use. Follow the manufacturer’s instructions to set your water softener’s hardness levels and regeneration settings.
Once set up, your DIY water softener should begin functioning effectively, providing soft water throughout your home. This step-by-step guide ensures that your installation is thorough, resulting in a system that will serve your household for years to come.
Testing and Maintenance After DIY Water Softener Installation: Ensuring Long-Term Success
Once your DIY water softener installation is complete, it is imperative to ensure the system is functioning as intended.
Testing its performance right after installation helps prevent potential issues from becoming costly repairs later.
Testing Your Water Softener System
Start by running water in your home to flush out any air pockets and impurities that might have entered during installation.
Check the incoming water pressure to make sure it falls within the recommended range for your water softener model.
Test the water quality by using a hardness test kit.
This will confirm whether your water softener is reducing hardness to the desired level.
Be sure to test water from a faucet connected to the softened water lines, as well as lines that bypass the system, to compare results.
Performing Maintenance Checks
Regular maintenance is crucial for sustaining the water softener’s efficiency over time.
Check salt levels in the brine tank periodically.
The salt should be kept above the water level, and the tank should be topped up as needed.
Inspect the system for any visible signs of wear or leaks in the connections.
Ensuring the bypass valve is in the correct position will avoid any operational hiccups.
Additionally, clean the resin tank periodically.
Follow your manufacturer’s instructions for cleaning and regenerating the resin beads to prevent them from becoming less effective.
Ensuring Longevity and Efficiency
Schedule annual inspections by a professional if you are unsure about any of the maintenance procedures, as this can help detect issues that are not immediately apparent.
Replacing certain components of your water softener, like the resin bed or pre-filters, as recommended by the manufacturer, also ensures continued performance.
With these testing and maintenance practices, your water softener should efficiently tackle hard water problems, leading to improved water quality and appliance longevity in your home.
Your commitment to regular maintenance will ensure a long-lasting solution that keeps your system in optimal working condition.
FAQ About DIY Water Softener Installation
What is hard water and how does it affect my home?
Hard water contains high levels of minerals like calcium and magnesium, which can lead to scale buildup in pipes and appliances, reducing efficiency and lifespan.
Can I install a water softener myself?
Yes, with the right tools and guidance, you can successfully install a water softener as a DIY project.
What tools are needed for a DIY water softener installation?
- Pipe cutter
- Adjustable wrench
- Pliers
- Measuring tape
- Screwdriver
How do I choose the right location for my water softener?
Select a location near your water’s entry point into the home and ensure access to a drain and electrical outlet.
How often should I perform maintenance on my water softener?
Regular maintenance should be performed every 3 to 6 months, including checking salt levels and cleaning the brine tank.