Imagine transforming your home’s energy efficiency with just a small device on your wall. Installing a smart thermostat not only brings comfort and convenience to your fingertips but also significantly reduces your energy bills. This guide is designed to demystify the wiring and installation process of smart thermostats, making it accessible for anyone looking to make their home smarter.
- Understand how your home’s current wiring setup influences the installation of a smart thermostat.
- Learn to safely identify and assess the compatibility of your existing thermostat wiring.
- Follow a comprehensive, step-by-step process to successfully install and configure your smart thermostat.
- Explore strategies to fully harness your smart thermostat’s capabilities for optimum energy savings and comfort.
By following this guide, not only will you gain a practical understanding of installing a smart thermostat, but you’ll also unlock potential energy efficiencies and elevate your home’s comfort level. Dive in to discover how easy it can be to embrace this smart home innovation.
Understanding Your Home’s Wiring Before Smart Thermostat Installation
Before diving into the smart thermostat installation, understanding your home’s existing wiring setup is an essential first step. The wiring configuration in your home significantly affects how smoothly the installation process will proceed.
Most homes use one of several common wiring frameworks: the C-wire system, the millivolt system, or the line voltage system. Each system varies in complexity and compatibility with modern smart thermostats.
The C-wire, or common wire, is often required for smart thermostats to provide a constant power supply. Homes with older wiring systems may lack this component, impacting the thermostat’s functionality. Recognizing whether you have a C-wire in place can help pinpoint which smart thermostat models will work best for you.
In some cases, an adapter or a new C-wire may be necessary, which can complicate the installation for those unfamiliar with wiring modifications. However, once you comprehend the foundational wiring setup, you’ll be better equipped to handle modifications if needed.
Thoroughly examining these elements before installation not only saves time but also ensures a safer and more effective integration of your new thermostat, ultimately enhancing energy efficiency and home comfort.
Identifying Your Current Thermostat Wiring
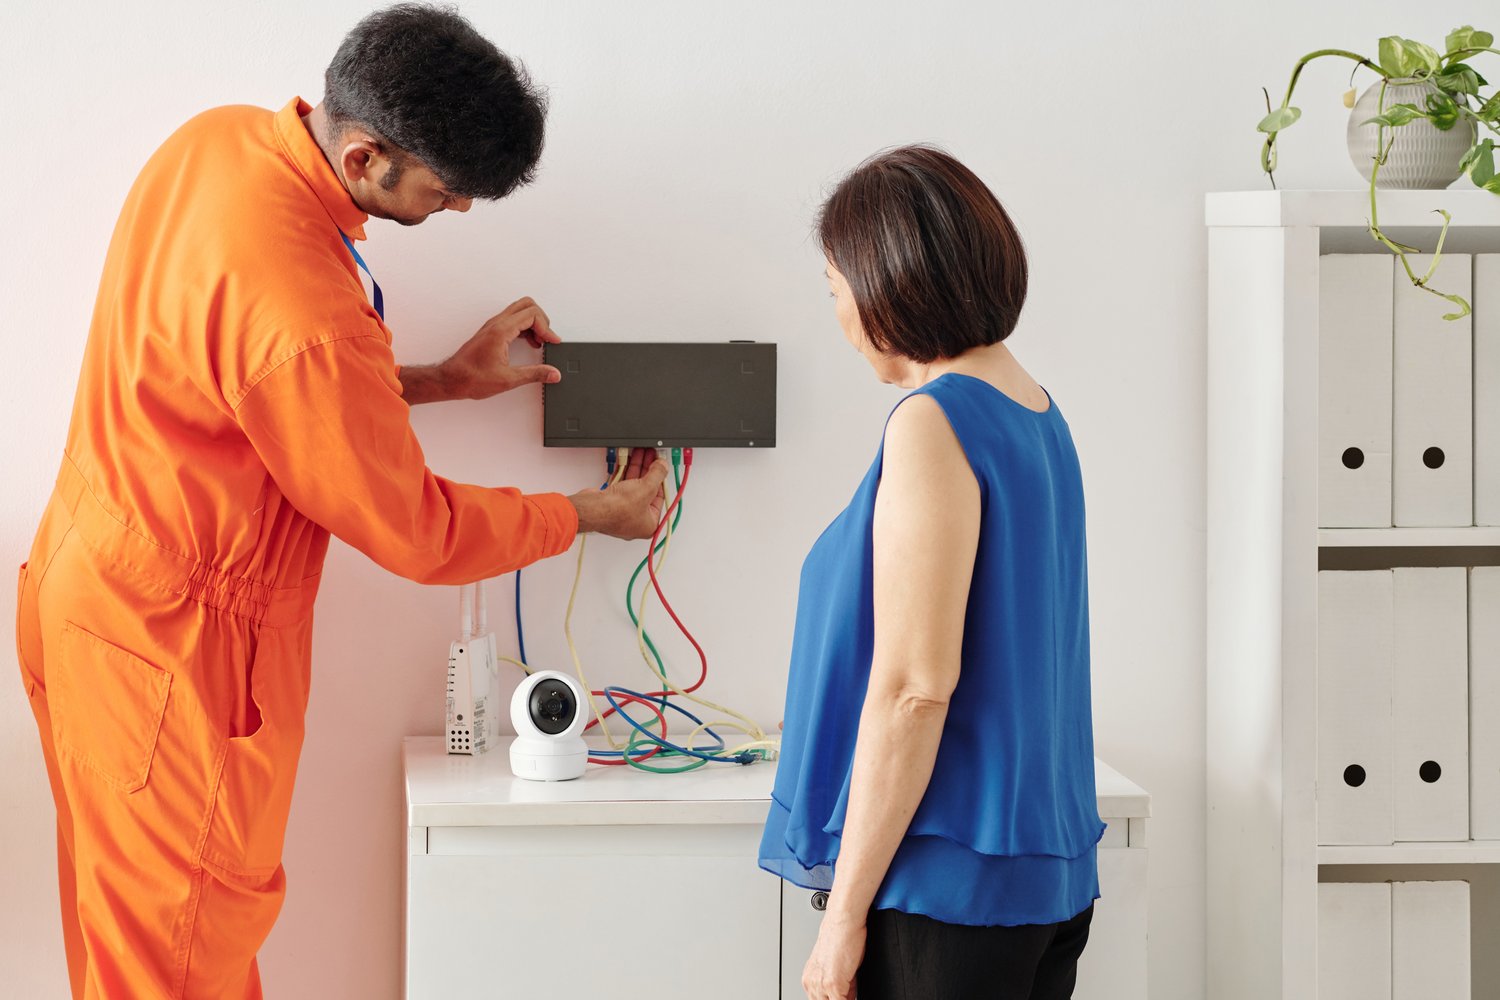
Safely examining and identifying the existing thermostat wiring is a critical step to ensure it is compatible with a new smart thermostat.
Begin by turning off the power to your HVAC system at the circuit breaker to prevent electrical shock or damage. Once it’s safe to proceed, remove the faceplate of your current thermostat to expose the wires.
You’ll typically see a set of wires connected to terminals marked by letters: for example, R (power), W (heat), Y (cool), and possibly G (fan). Each wire plays a unique role, and matching these with your new smart thermostat’s wiring scheme is key to a successful installation.
Documenting your current wiring by taking pictures or making notes can be immensely helpful, especially when reattaching wires during the installation of your new device. Knowing these connections in advance will help verify compatibility or identify if additional setup or components, like a C-wire adapter, are required.
This analysis not only aids in the smooth installation but also reduces the risk of faulty wiring or thermostat malfunction, paving the way for a seamless transition to a smarter and more efficient home temperature management system.
How to Install a Smart Thermostat: Complete Wiring and Setup Guide for Any Home
Installing a smart thermostat can significantly enhance your home’s energy efficiency. To successfully install your new device, it is essential to follow a precise, step-by-step guide.
Step 1: Gather Necessary Tools
Before beginning, assemble the required tools. You will need a screwdriver, a drill (if required to mount the device), and a voltage tester. These tools will help ensure a safe and efficient installation process.
Step 2: Turn Off Power
Always prioritize safety by switching off power to your current thermostat at the circuit breaker. This precautionary step prevents electrical accidents during the installation.
Step 3: Remove the Old Thermostat
Remove the existing thermostat from the wall by unscrewing it and carefully disconnecting the wires. Be sure to label each wire according to the terminals they were connected to. This will aid in ensuring correct connections with your smart thermostat.
Step 4: Install the New Thermostat Base
Mount the new thermostat base by aligning it with the existing holes or drilling new ones if necessary. Make sure it is level before proceeding to secure it with screws.
Step 5: Connect the Wires
Carefully connect the labeled wires to their corresponding terminals on the smart thermostat. Ensure all connections are tight and secure for optimal operation.
Step 6: Attach the Smart Thermostat
Snap the smart thermostat onto its mounted base. Reattach power at the circuit breaker and follow the manufacturer’s instructions to configure your device settings.
Common pitfalls to avoid include not labeling wires before disconnection or skipping the crucial step of checking compatibility between your HVAC system and the smart thermostat. Following these guidelines can help prevent installation errors and ensure your system is set up correctly. Smart thermostat installation is an investment in the energy-efficient future of your living environment.
Maximizing Your Smart Thermostat’s Efficiency
To fully benefit from your smart thermostat, understanding its advanced features and settings is vital. Here are some expert tips to achieve optimal energy savings and comfort at home.
Utilize Learning Capabilities
Many smart thermostats feature adaptive learning. Set the temperature preferences for different times of the day, and the device will automatically adjust based on your routine. Over time, it learns the ideal settings for maximum comfort and efficiency.
Integrate with Smart Home Devices
Connecting your smart thermostat to compatible smart home ecosystems like Amazon Alexa or Google Home can enhance control. Automate temperature adjustments using voice commands and establish routines that synchronize with your daily activities.
Enable Energy Reports
Regularly review energy usage reports available through the thermostat app. These insights offer an opportunity to spot patterns that may lead to high consumption and adjust settings for improved efficiency.
Set Temperature Zones
If your system supports it, create temperature zones to fine-tune heating and cooling in specific rooms or areas. This reduces energy waste in unoccupied spaces and enhances targeted comfort throughout your home.
By utilizing these advanced tips, you can enhance your smart thermostat’s performance. This ensures your home’s energy efficiency and comfort remain at optimal levels year-round. Share your own best practices, and continue exploring the potential of integrating smart technologies in your household.
Smart Thermostat Installation FAQ
What tools do I need to install a smart thermostat?
You will need: screwdriver, drill (if necessary), voltage tester, and a smartphone or tablet for setup.
Can I install a smart thermostat with any heating system?
Most systems are compatible, but check if your heating system needs a ‘C’ wire for power.
What is a ‘C’ wire, and why is it important?
‘C’ wire provides continuous power to your thermostat, necessary for most smart models.
How do I identify my current wiring?
Carefully remove your thermostat cover and look for labeled wires. Use a guide to match the labels, e.g., ‘R’, ‘W’, ‘Y’, ‘G’.
What should I do if my current setup lacks a ‘C’ wire?
Consider using a power extender kit or consulting a professional for alternative solutions.
How do I maximize energy savings with a smart thermostat?
Program schedules, enable learning features, and connect to smart home systems for optimal efficiency.
Is it safe to install a smart thermostat myself?
Yes, if you follow instructions carefully and ensure the power is off during installation.