Is your smart pet feeder leaving your furry friend hungry? The issue often lies within the feeder’s motor and timer controls. With technology designed to simplify pet care, a malfunctioning device can quickly become a source of frustration. Ensuring your pet feeder operates smoothly is crucial not just for your convenience, but for your pet’s well-being.
- Discover the fundamental role of motor and timer controls in smart pet feeders.
- Learn how to diagnose motor malfunctions to keep your feeder dispensing properly.
- Explore tips for adjusting timer settings to maintain an efficient feeding schedule.
Understanding these key components not only solves immediate problems but also helps prevent future disruptions, ensuring your pet stays happy and well-fed. Dive into the article to gain insights and practical solutions.
Understanding Your Smart Pet Feeder: Motor and Timer Control Guide
Smart pet feeders are an essential tool for pet owners who want to ensure their furry friends are fed on time, even when they’re not home. These devices rely on advanced technology to automate the feeding process, providing convenience and peace of mind.
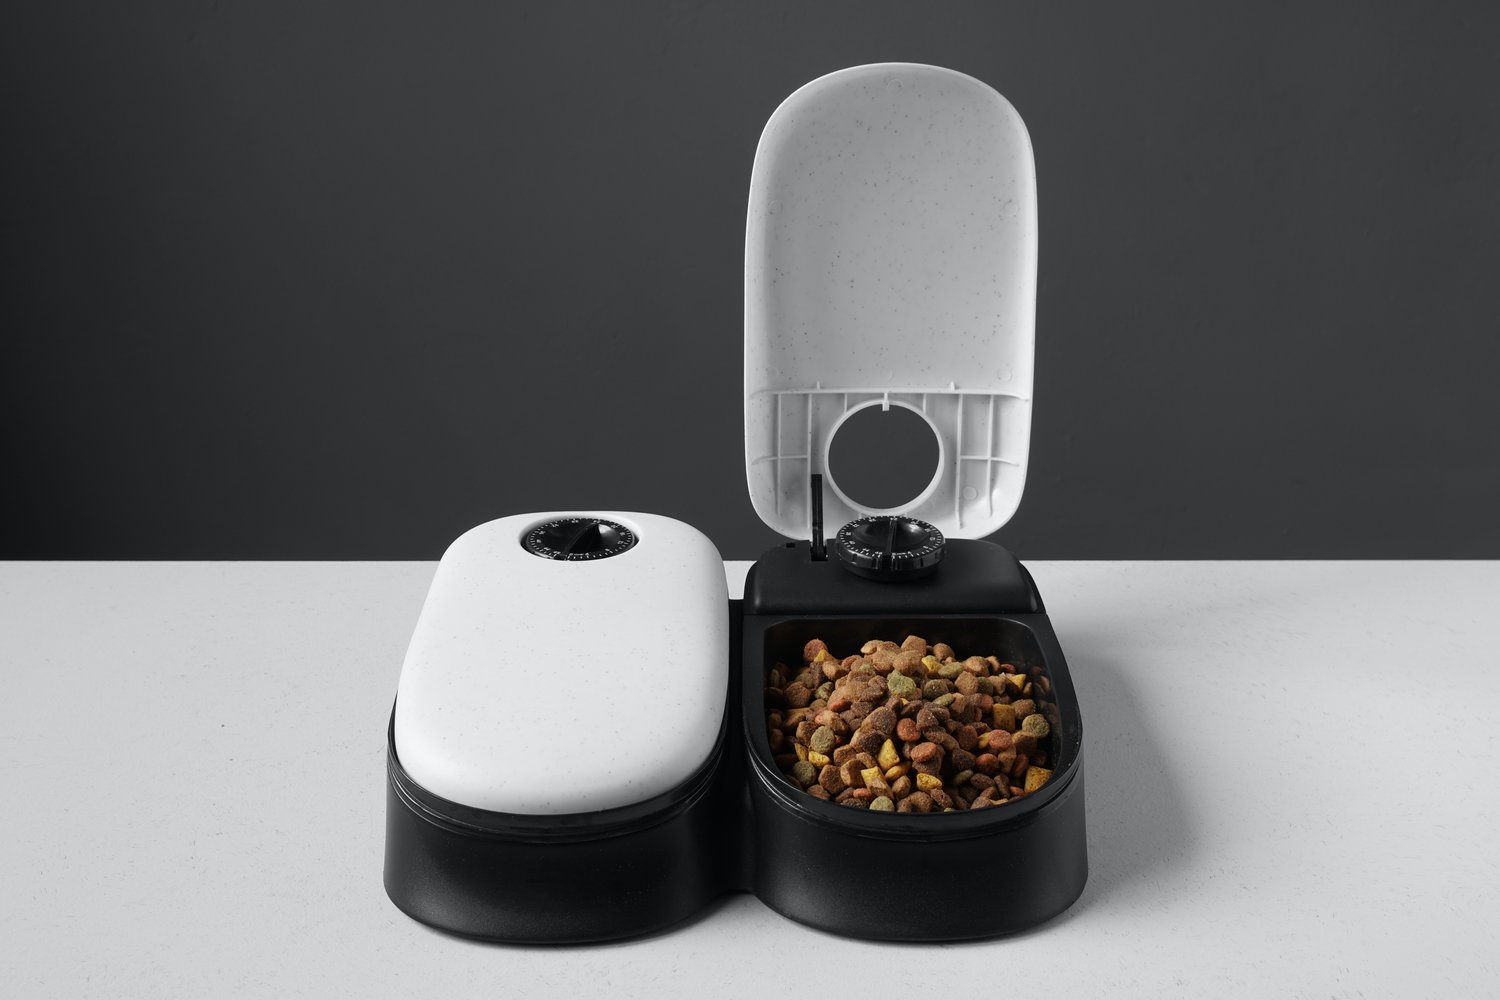
At the heart of a smart pet feeder’s functionality are two critical components: the motor and timer controls. The motor is responsible for the physical mechanism that dispenses the food. This typically involves rotating a dispensing wheel or activating levers to release a set portion of pet food into the feeding tray.
The timer control in the feeder regulates the schedule and frequency of feedings. By setting specific intervals, pet owners can ensure their pets receive regular and timely meals. Understanding these components not only aids in the maintenance of your device but also enhances its efficiency. By improving your knowledge of these parts, you can better troubleshoot any dispensing issues that may arise.
Diagnosing Motor Malfunctions in Smart Pet Feeders
Identifying motor malfunctions in your smart pet feeder is crucial to maintaining consistent feeding for your pet. Common signs of motor issues include sudden stopping during dispensing, unusual noises, or the feeder failing to dispense food altogether.
To diagnose these issues, start by listening to the sounds your feeder makes. A grinding or clicking noise may indicate an internal obstruction or a potential wear and tear of mechanical parts. Additionally, if the motor does not activate when expected, inspect connections and ensure there are no power supply issues.
Basic troubleshooting can often resolve simple problems. First, ensure that the feeder is clean and free of debris that could hinder the motor’s movement. Check for any visible blockages around the dispensing mechanism and remove them carefully. Furthermore, ensure that battery connections are secure and that the power supply is adequate.
By understanding these diagnostic steps, you can address motor malfunctions effectively and keep your smart pet feeder operating smoothly. This will ensure your pet never misses a meal, maintaining their health and your peace of mind.
Optimizing Timer Settings for Your Smart Pet Feeder: Motor and Timer Control Guide
Ensuring that your pet is fed on time is crucial for their health and well-being. Smart pet feeders come equipped with timer controls that help automate feeding schedules. By understanding and optimizing these settings, you can improve the reliability and efficiency of your pet feeding system.
Firstly, review the user manual that came with your smart pet feeder to familiarize yourself with the timer functionalities. Each device might have different features, but most modern feeders allow you to set multiple feeding times within a 24-hour period.
Begin by setting a consistent schedule that aligns with your pet’s natural feeding habits. For instance, if your cat typically eats twice a day, program the timer to release food in the morning and evening. Consistency is key in helping pets maintain a healthy routine.
Next, consider the portion sizes you’re setting. Incorrect portion settings can lead to your feeder dispensing too much or too little, affecting the timer’s efficiency. Make sure to calibrate the timer according to the recommended food quantity for your pet’s size and dietary needs.
Utilizing a backup timer schedule can also add a layer of reliability. By programming an additional backup feeding time, you ensure that your pet will be fed even if an error occurs during the primary feeding schedule.
Don’t forget to check battery levels regularly if your timer is battery-powered. This small step can prevent failures in the feeding schedule.
Finally, experiment with your settings to refine the timing. Assume control by adjusting based on seasons or changes in your pet’s behavior, ensuring their feeding schedule remains efficient and responsive to their needs.
By effectively managing the timer settings, you can enhance the performance of your smart pet feeder, ensuring that your pet remains happy and healthy. Have you tried any unique strategies to optimize your feeder’s timer settings? Share your practices with the community!
Smart Pet Feeder Troubleshooting FAQ
What should I do if my smart pet feeder is not dispensing?
Check the power source and ensure the feeder is properly plugged in. Inspect the motor for blockages and verify the timer settings are correct.
How can I tell if the motor is malfunctioning?
Listen for unusual noises coming from the motor or observe if the dispensing mechanism is stuck.
What are common timer issues in smart pet feeders?
Timers might not function due to incorrect settings or a software glitch. Resetting the settings may solve these problems.
Is it possible to fix a jammed motor myself?
Yes, gently clean the dispensing mechanism to remove debris. Ensure the motor is disconnected from power before working on it.
Can improper timer settings cause overfeeding?
Yes, incorrect settings can lead to incorrect portion sizes or off-schedule feeding.
How often should I maintain my smart pet feeder?
Regularly check for blockages and ensure components are functioning properly. A monthly inspection is recommended.