Transforming the way your home feels is often just a matter of choosing the right upgrades. Electric underfloor heating presents an innovative solution, offering comfort and efficiency in one package. Whether you’re a seasoned DIY enthusiast or stepping into home improvements for the first time, this guide will walk you through the entire process, highlighting the unique benefits that await.
- Discover the essential tools and materials you’ll need for a smooth installation, avoiding common pitfalls with vital safety precautions.
- Understand how to analyze your floor layout and calculate power requirements to maximize heating efficiency and system performance.
- Follow our step-by-step instructions to confidently install your electric underfloor heating, ensuring a cozy and comfortable living space.
By carefully following the guidelines in this article, you’ll not only enhance your home’s comfort but also engage with a friendly community eager to share insights and experiences. Dive in to discover the transformative power of electric underfloor heating.
Preparing for Your DIY Electric Underfloor Heating Installation: Essential Tools and Materials
Embarking on the DIY journey of electric underfloor heating installation requires meticulous preparation. Ensuring you have the proper tools and materials at hand can make a significant difference in the efficiency and success of your project.
First, gather the essential tools, starting with a digital multimeter. This crucial device helps verify electrical circuits to avoid potential hazards. Additionally, having a pair of high-quality wire strippers and cutters will facilitate precise cable management.
A thermal floor sensor is indispensable to monitor temperatures, enhancing the system’s energy efficiency. Furthermore, a reliable voltage tester guarantees safe handling of all electrical parts during the installation process.
As for materials, begin with purchasing a suitable electric underfloor heating kit. This typically includes heating cables or mats, a thermostat, and sometimes an insulation layer for extra efficiency. Ensure the chosen kit corresponds to the floor type you are working with, be it tile, wood, or carpet.
Don’t overlook safety! Equip yourself with protective gear such as insulated gloves and safety glasses to safeguard against unforeseen accidents.
By having all these tools and materials ready, you establish a solid foundation for your underfloor heating project, optimizing the process’s safety and effectiveness. Now that you’re equipped, let’s delve into the detailed planning phase to ensure the layout and power requirements are perfectly aligned with your home’s needs.
Detailed Planning: Understanding Your Floor Layout and Power Requirements
Before diving into the physical installation of electric underfloor heating, thorough planning and layout assessment are critical. Understanding the dimensions and characteristics of your floor space will guide the arrangement and efficiency of your heating system.
Begin by measuring the total floor area and identifying the specific zones where heating is desired. Consider aspects like furniture placement to determine practical coverage areas, ensuring the heating mats or cables won’t be unnecessarily obstructed.
Calculating the power requirements is a pivotal step. Accurately estimating the electrical load helps ascertain that your existing circuitry can handle the new demand without overloading. Most residential systems require a power supply ranging from 100 to 150 watts per square meter, although this might vary based on your floor type and insulation quality.
Furthermore, installing a separate circuit dedicated to the underfloor heating system may be necessary to maintain safety and reliability. Consult with a qualified electrician to confirm that your home’s electric panel can support the addition.
Mapping out the electric layout efficiently ensures the heat distribution is even, maximizing comfort. Identify the thermostat’s location where it can manage the system effectively, avoiding posting it near heat sources like radiators which might give false readings.
Consider the proximity of your thermostat to the electrical panel, as closer proximity can simplify installation and minimize potential complications. With these considerations thoroughly mapped out, you are on the right track to achieving a seamless underfloor installation experience.
Installing Your DIY Electric Underfloor Heating System: A Step-by-Step Guide for Homeowners
Embarking on a DIY electric underfloor heating installation provides an opportunity to enhance your home’s comfort and energy efficiency. This step-by-step guide will walk you through the entire process, from beginning to end, ensuring you have a warm and cozy floor to enjoy.
Step 1: Laying the Insulation
Begin by cleaning the subfloor surface thoroughly to ensure it’s free from debris. Lay down the insulation material designed for electric underfloor heating systems, which helps retain heat and improves energy efficiency. Make sure the insulation fits snugly across the entire floor area.
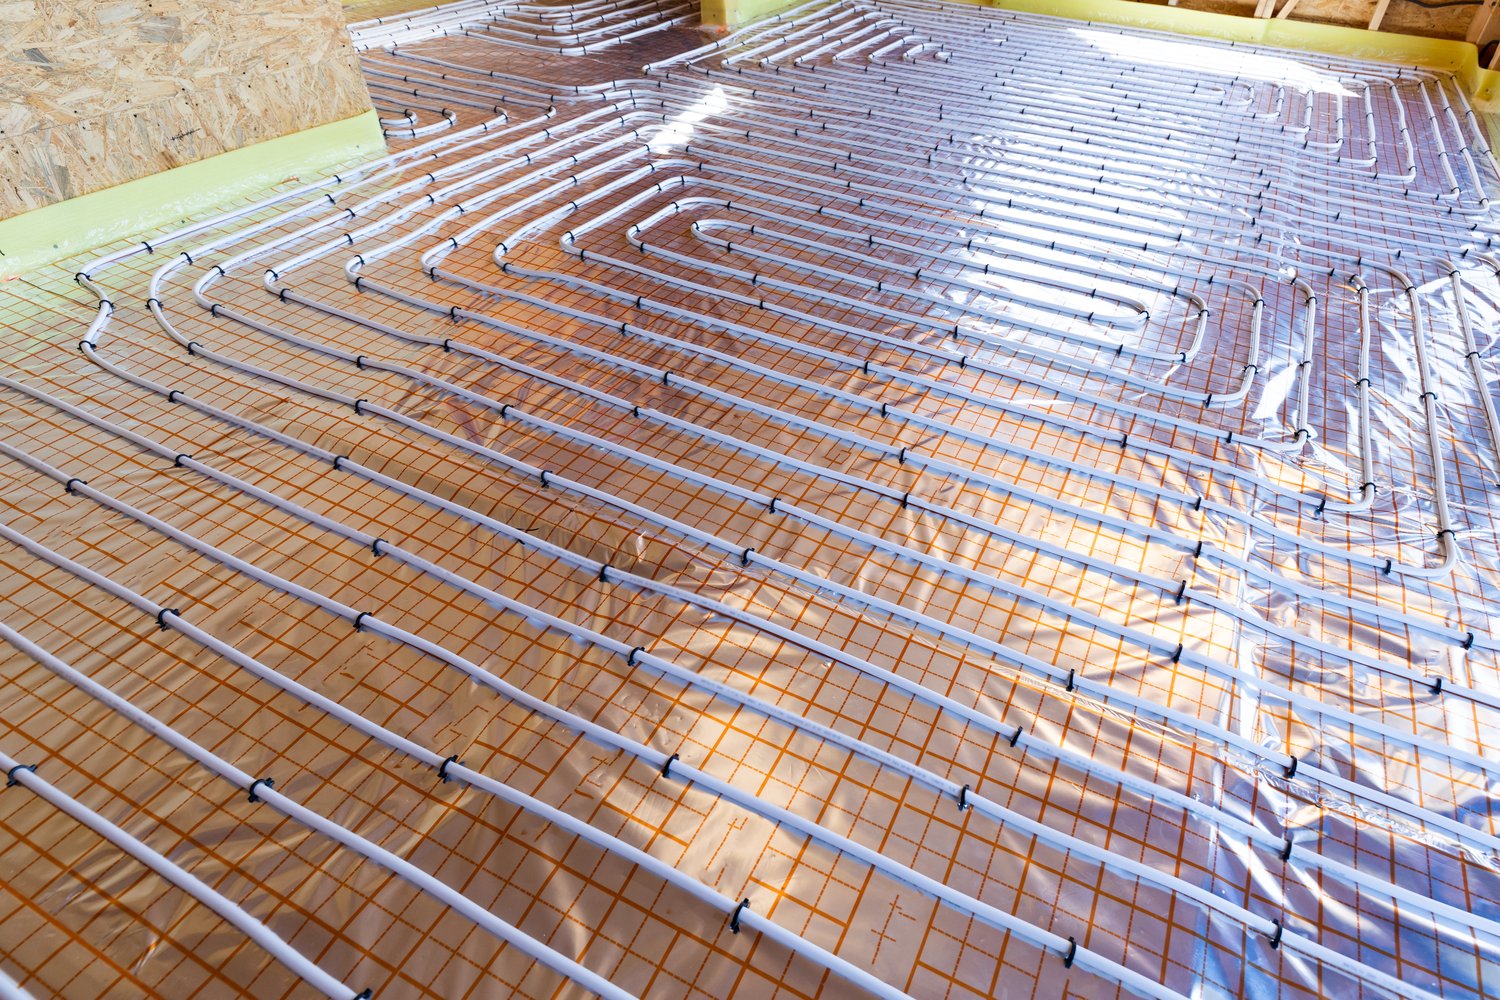
Step 2: Planning and Positioning the Heating Cables
Refer to your design plan for cable layout and start positioning the heating cables on top of the insulation. It’s crucial to maintain appropriate spacing between cables as specified by the manufacturer to prevent overheating. Use a tape or fixing strips to secure the cables in place.
Step 3: Connecting the Thermostat
The thermostat plays a vital role in controlling the temperature of your underfloor heating system. Follow the manufacturer’s instructions to connect the thermostat cables, ensuring all electrical connections are secure.
Step 4: Testing the Heating System
Before covering your heating cables with flooring material, it’s essential to test the system. Connect the system to the power supply and switch on the thermostat to monitor its function. Verify that the cables heat evenly across the entire floor.
Step 5: Laying the Final Floor Covering
Once testing confirms everything is in working order, install the final floor covering. This could be tile, laminate, or any other material compatible with electric underfloor heating. Be cautious during this step to avoid damaging the cables beneath.
With meticulous attention to each step, your DIY electric underfloor heating installation will provide warmth and comfort, making chilly floors a thing of the past. If any issues arise, consult a professional to ensure your system works efficiently and safely. Engage with our community by sharing your experiences and insights.
Frequently Asked Questions About DIY Electric Underfloor Heating Installation
What are the benefits of electric underfloor heating?
Electric underfloor heating offers energy efficiency, consistent warmth, and space-saving compared to traditional systems.
Is electric underfloor heating suitable for all floor types?
Yes, but it is crucial to use materials and insulation suitable for each specific floor type.
Do I need a special thermostat for electric underfloor heating?
Yes, you need a thermostat that is specifically designed to control underfloor heating systems.
How do I ensure safety during installation?
Always switch off the power before starting and follow all safety guidelines related to electric installations.
Can I install electric underfloor heating myself, or should I hire a professional?
DIY installation is possible, but hiring a professional is recommended if you lack electrical experience.
How long does it take for underfloor heating to warm a room?
Typically, it takes 30 to 90 minutes for electric underfloor heating to warm up a room.