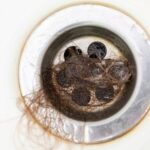
Humidity and poor ventilation in your bathroom can quickly lead to mold growth, creating an unhealthy environment. Addressing this issue doesn’t have to be daunting, even if you’re not a seasoned DIY enthusiast. Installing a bathroom fan is a smart solution that dramatically improves air quality and comfort. Let’s delve into the essential steps you need to transform your bathroom into a fresher, mold-free zone.
- Assessing Your Needs: Determine the specific fan type and size that best suits your bathroom to ensure effective moisture and odor control.
- Choosing the Right Equipment: Consider crucial factors such as the fan’s capacity, noise level, and energy efficiency to ensure your selection meets your bathroom requirements.
- The Installation Process: Follow our pragmatic guide on preparing the space, wiring the fan, and securely mounting it for optimal performance and safety.
By mastering these straightforward steps, you can not only prevent mold but also significantly enhance your living space’s ventilation. Dive into this practical guide and discover ways to make impactful improvements in maintaining a healthy home environment.
DIY Bathroom Fan Installation: Prevent Mold & Improve Ventilation in 8 Steps – Assessing Your Needs
Before embarking on your DIY bathroom fan installation, it’s essential to assess whether a fan is needed in your bathroom. A bathroom fan plays a crucial role in reducing humidity, preventing mold growth, and improving overall air quality.
Consider the size of your bathroom and the existing ventilation options. If your bathroom frequently experiences condensation on walls or mirrors, or if odors linger, these are strong indicators that a bathroom exhaust fan is necessary.
Once you’ve determined the necessity, the next step is to choose the right fan size, which is usually measured in cubic feet per minute (CFM). The appropriate CFM depends on your bathroom’s square footage. Proper sizing is crucial as an undersized fan won’t efficiently clear moisture and odors, while an oversized fan may lead to unnecessary energy use.
Choosing the Right Equipment for Your Home
Selecting the correct bathroom fan model is key to optimizing both performance and energy efficiency. Start by considering the fan’s capacity which, as mentioned, is measured in CFM. Match the fan capacity to your bathroom size for optimal moisture control.
Next, evaluate the noise level, measured in sones. For a tranquil bathroom environment, opt for fans with a rating of 1.5 sones or less. These quieter models ensure a peaceful atmosphere without compromising ventilation effectiveness.
Another factor is energy efficiency. Look for fans with the Energy Star label to save on electricity bills and reduce your carbon footprint. These models consume less energy and often include innovative features such as motion sensors and timers.
Finally, consider the fan’s design and aesthetics. Modern bathroom exhaust fans come in a variety of styles and finishes, allowing seamless integration with your decor.
DIY Bathroom Fan Installation: Prevent Mold & Improve Ventilation in 8 Steps – The Installation Process
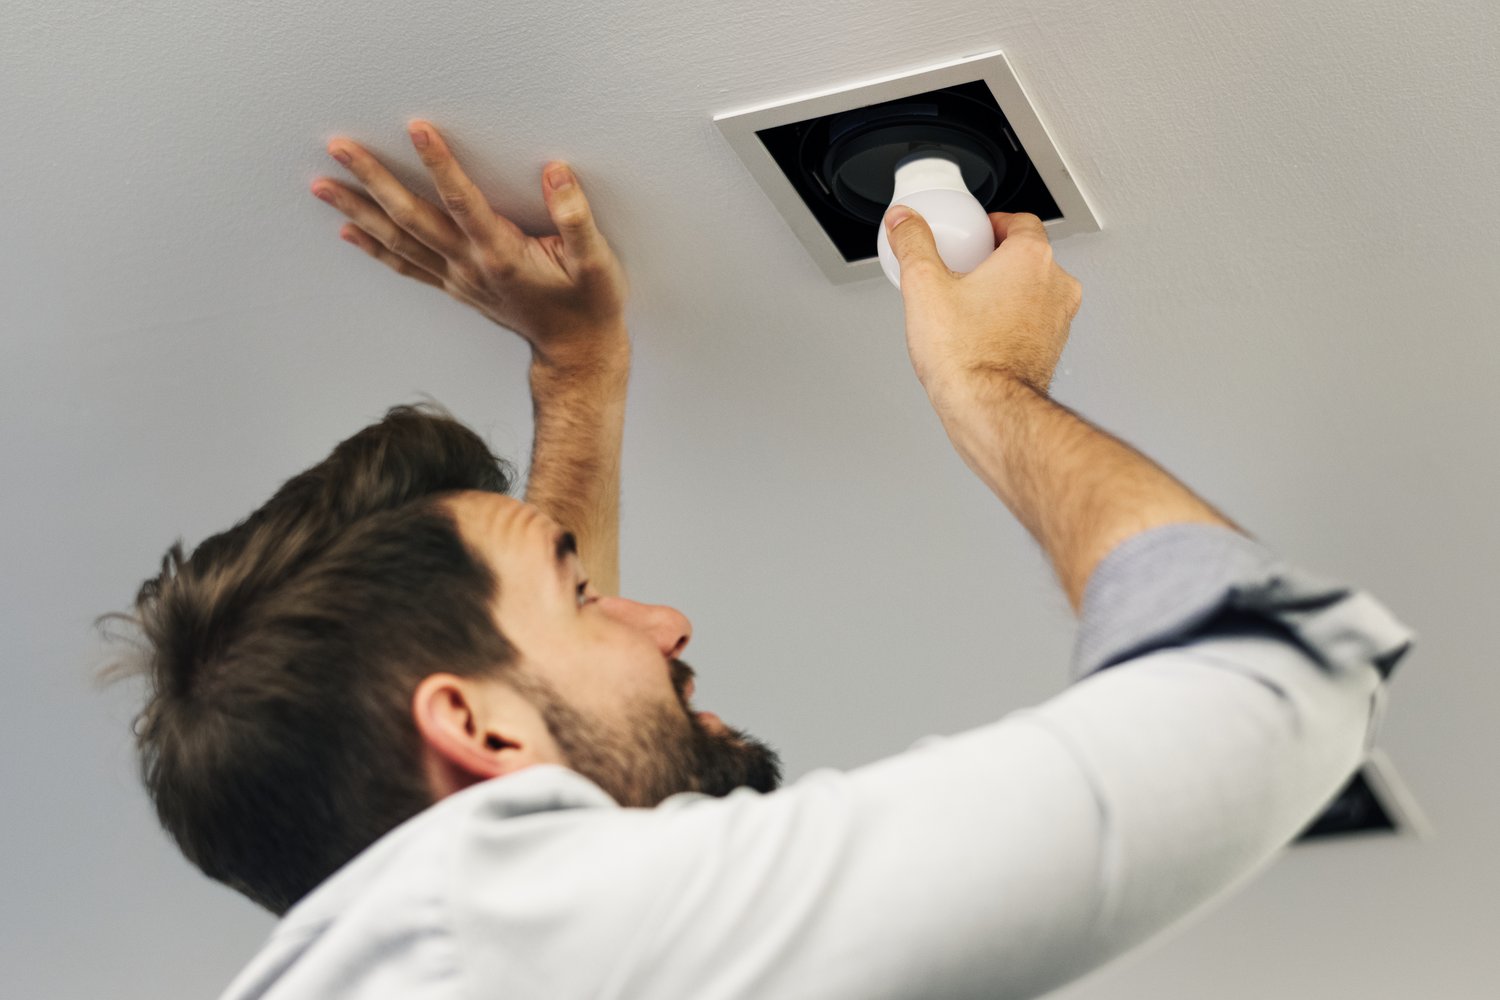
Installing a bathroom fan is not only essential for controlling humidity levels but can also enhance your home’s indoor air quality significantly. Follow these precise steps to ensure a secure and efficient installation.
Step 1: Preparing the Area
Begin by turning off the power supply to the bathroom at your home’s electrical panel to ensure safety. Remove the old fan if there is one in place. Make sure to clean the area where the new fan will be installed, clearing away dust and debris that might hinder the installation process.
Step 2: Cutting the Ceiling Opening
Using the template provided with your new fan, outline the area on the ceiling where the fan will be positioned. Carefully cut the opening, ensuring it aligns perfectly with the size of the fan housing to prevent air leaks.
Step 3: Wiring the Fan
Before starting the wiring, double-check that the power is off. Locate the existing wiring in your ceiling. Connect the fan wires to your home’s wiring according to the provided instructions. Typically, this involves connecting the black and blue wires to the power supply, and the green wire to the grounding screw. Ensure all connections are secure and insulated properly.
Step 4: Installing the Fan Housing
Insert the fan housing into the ceiling opening, making sure it fits snugly. Secure it into place using the supplied mounting brackets. Double-check that the fan is positioned correctly and that the housing does not wobble.
Step 5: Attaching the Vent Duct
Attach the ductwork firmly to the fan’s exhaust port. This will direct the moist air away from your bathroom, preventing mold growth. Seal the duct connection with foil tape to prevent any potential air leaks.
Step 6: Connecting to External Vent
Ensure the fan’s ductwork connects properly to an external vent. This step is crucial to eliminate moisture from the house rather than circulating it within. Make sure the exterior vent cap is installed where the duct exits the home and is free from blockages.
Step 7: Securing the Fan Cover
Place the fan cover over the housing. Most covers are designed to snap into place, but some may require screws. Ensure it is secure and evenly positioned, providing a finished look as well as protecting the internal components.
Step 8: Testing the Installation
Restore the power supply and test the bathroom fan. Confirm it operates smoothly without any unusual noises. Check that the fan effectively draws air out of the room, indicating a successful installation. If issues are encountered, revisit each step to identify and correct the problem.
By adhering to this guide, you can confidently install a bathroom fan that reduces humidity and improves overall ventilation. For those looking to maximize home comfort and safety, consider regular maintenance checks and potential future upgrades.
Frequently Asked Questions about DIY Bathroom Fan Installation
What factors should I consider when choosing a bathroom fan?
Consider the fan’s capacity (measured in CFM), noise level (measured in sones), and energy efficiency to ensure it meets your bathroom’s requirements.
How do I determine the right size for a bathroom fan?
Calculate the square footage of your bathroom and choose a fan with an appropriate CFM rating. Typically, 1 CFM per square foot is recommended.
Can I install a bathroom fan without attic access?
Yes, but it may require special tools and techniques. Consider using a wall-mounted fan if attic access is limited.
Do I need a dedicated circuit for my bathroom fan?
Check local electrical codes. Some regions require a dedicated circuit, especially for fans with heaters or lights.
What precautions should I take during installation?
- Turn off the power before starting.
- Use safety gear like goggles and gloves.
- Ensure proper ventilation paths.