When was the last time you checked the accuracy of your home air quality monitor? Ensuring precise readings is more than just a technical adjustment; it’s a vital step in maintaining a healthy and safe living environment. In this guide, we’ll delve into the intricacies of calibrating and testing your home air quality monitor, unlocking the secrets to achieving precise measurements, and improving your indoor air quality.
- Discover the reasons why your air quality monitor readings might be inaccurate and how to spot the signs of misinformation.
- Uncover a simple yet effective step-by-step guide to calibrating your monitor for optimal accuracy.
- Learn the best testing techniques and troubleshooting tips to ensure your device continues to perform impeccably.
- Equip yourself with expert insights to safeguard your home’s environment with reliable air quality data.
By engaging with these practical strategies, you’ll not only enhance your monitor’s dependability but also create a healthier living space. Dive deeper into this guide and take proactive steps towards improving your indoor environment.
Understanding Home Air Quality Monitor Readings and Why They Might Be Incorrect
Home air quality monitors play a crucial role in ensuring a health-friendly environment, but their readings aren’t always spot on. Several factors can impact the accuracy of these devices, leading to potential misinterpretations of indoor air quality data. Let’s explore why these inaccuracies might occur.
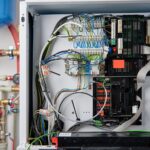
A significant factor affecting air quality monitor readings is device calibration. If an air quality monitor is not properly calibrated, its sensors may misjudge the levels of pollutants, making the readings unreliable. Regular calibration is essential to ensure accurate results.
Another common issue is sensor degradation. Over time, sensors may wear out or become less sensitive, which can skew readings. Replacing old sensors can help maintain device accuracy.
Environmental conditions, such as temperature and humidity, also play a role. Fluctuations in these conditions can affect sensor performance, resulting in incorrect readings. It’s advisable to keep the monitor in a stable environment to reduce these effects.
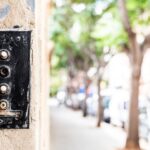
Finally, placement of the air quality monitor greatly influences its effectiveness. If the monitor is placed near a door, window, or air vent, it may give readings that don’t accurately reflect indoor air conditions. Optimal placement will ensure more reliable data.
Identifying Symptoms of Incorrect Home Air Quality Monitor Readings
Inconsistent air quality monitor readings can be a red flag for homeowners. Recognizing these signs early can help in taking corrective action to ensure accurate monitoring.
One tell-tale sign of a malfunctioning monitor is inconsistent readings. If your air quality monitor shows significant fluctuations over short periods without any apparent environmental changes, it may be time to check its calibration.
Another symptom is when the readings don’t match your environment. For example, if you notice poor air quality readings while the air feels fresh and clean, this discrepancy signals potential inaccuracy.
Excessive or minimal variance in readings could also indicate a problem. If there is an abrupt spike or drop in air quality without a known cause, it could suggest a fault in the monitor.
By paying close attention to these indicators, you can diagnose issues with your home air quality monitor and ensure it provides the reliable data necessary for maintaining a healthy indoor environment.
Calibrating Your Home Air Quality Monitor: Step-by-Step Guide
Calibrating your home air quality monitor is essential for obtaining precise readings that reflect your indoor environment. Accurate air quality measurements contribute significantly to maintaining healthy living spaces. Follow this step-by-step guide to ensure your device is correctly calibrated.
Firstly, check the manufacturer’s manual for specific calibration instructions unique to your model. This document often provides essential guidance tailored for your particular air quality monitor.
Begin by placing the monitor in an area with known air quality conditions. This could be outdoors where air quality is generally established or refer to local air quality reports.
Next, zero the device by following the standard calibration process outlined by the manufacturer. Many air quality monitors have a built-in zeroing function intended to recalibrate sensors that might drift over time.
It’s also important to ensure your device’s firmware is up-to-date. Regular software updates from the manufacturer often include improvements that enhance calibration accuracy.
After zeroing, test the device using a test gas, if available. This will help validate the calibration process. Be mindful of the recommended test gas concentrations for your specific model.
By following these steps, you ensure that your home air quality monitor provides accurate and reliable readings, enhancing the safety of your living environment.
Testing and Troubleshooting: Ensuring Accurate Home Air Quality Monitor Readings
Once your home air quality monitor is calibrated, it’s important to regularly test its functionality. Reliable air quality readings are crucial in maintaining a healthy home environment. Start by periodically checking the device against known air conditions in your area as outlined in official air quality reports.
One effective technique is to compare readings from your monitor with other reliable air quality data. This comparative analysis helps verify the device’s accuracy. If your monitor’s readings consistently deviate significantly from expected values, further troubleshooting may be necessary.
First, ensure the monitor’s placement is appropriate. Avoid placing the device near sources of pollution or close to ventilation sources which can skew results. Clean the air sensor, as dust and debris might affect the accuracy of readings. Use gentle cleaning methods as recommended by the manufacturer.
If discrepancies persist, perform a device reset and repeat the calibration process. Check for software updates, as manufacturers frequently release updates to resolve known issues and improve functionality.
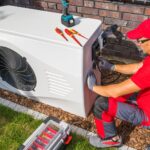
Sometimes, sensor wear or malfunctions can occur. If issues continue, consult the manufacturer or consider professional servicing to ensure optimal performance. Using these testing and troubleshooting techniques will help maintain the precision of your air quality monitor and ensure a safe indoor environment.
Frequently Asked Questions
Why is my air quality monitor giving incorrect readings?
Your air quality monitor may give incorrect readings due to factors like device placement, sensor deterioration, or software issues.
How often should I calibrate my air quality monitor?
It’s recommended to calibrate your air quality monitor every 6-12 months or after any major environment change.
Can temperature affect air quality readings?
Yes, extreme temperatures can affect sensor accuracy and lead to incorrect air quality readings.
How do I know if my air quality monitor needs testing?
If readings are inconsistent or do not match your environment, testing may be necessary.
What should I do if calibration doesn’t resolve inaccurate readings?
Consider professional servicing. If issues persist, the device might need professional evaluation or replacement.
Where should I place my air quality monitor for best results?
Avoid direct sunlight and obstructions. Place it at breathing height for the most accurate readings.